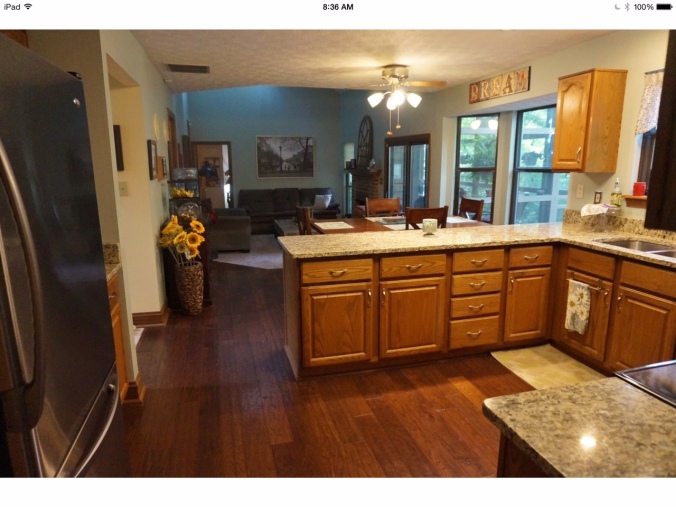
I recently took advantage of having time off of work to get my new house in order. One of the most important rooms in the house for me is my kitchen, and the kitchen in this house hadn’t really been changed since it was built in 1989. The previous owners installed granite countertops and a really pretty hand scraped hardwood floor, but they left the ugly oak cabinets. After reading many blog reviews and looking at tons of pictures on Pinterest, I decided to go to Lowes and purchase the cabinet transformations kit from Rust oleum. Here are pictures of my cabinets before I started: 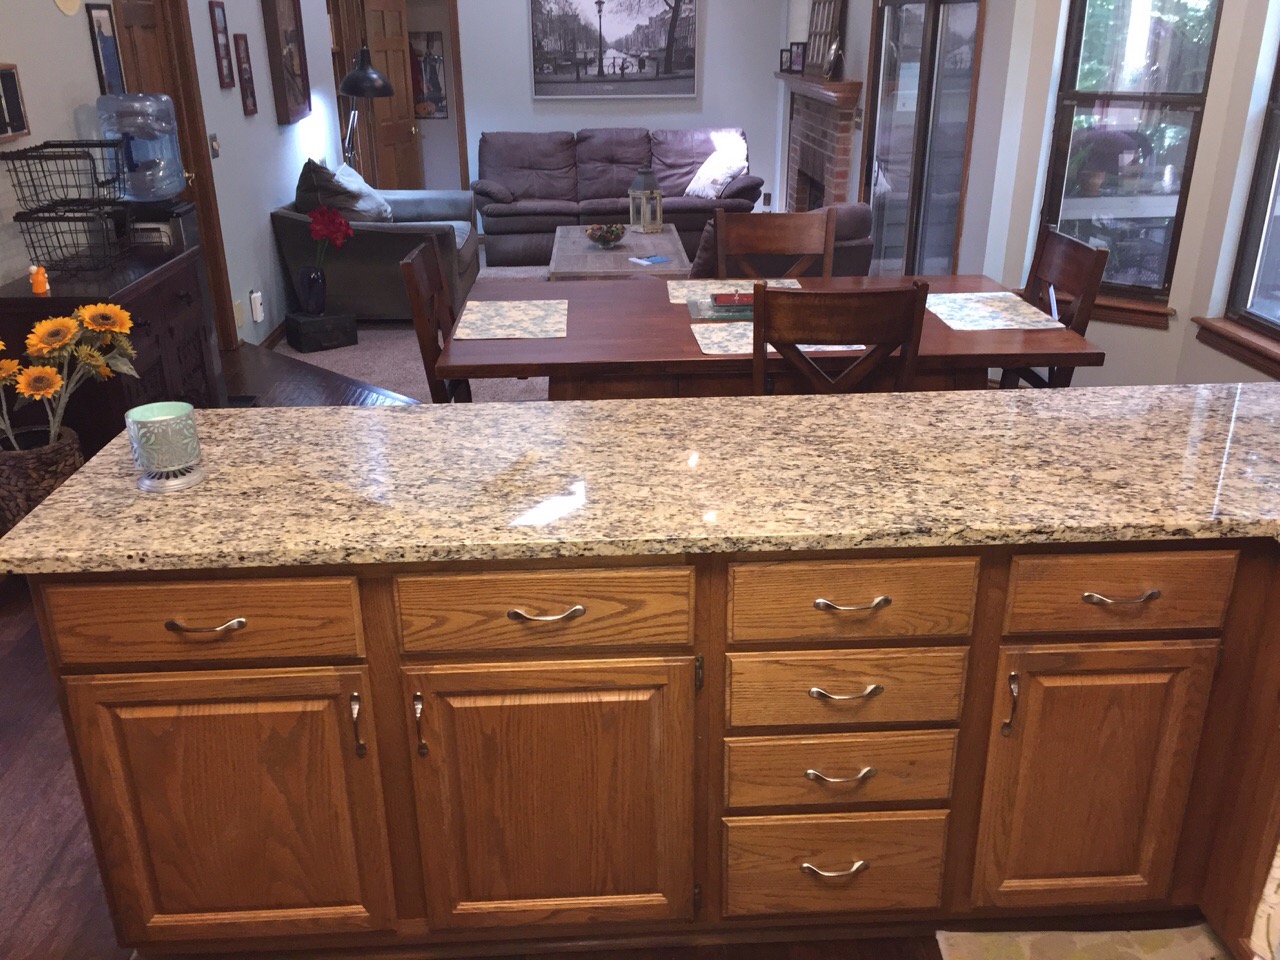


I knew that I wanted a French country look to my kitchen as I love the distressed and antique look that is very popular right now. Also the back side of our home where the kitchen is is very dark because it faces are very wooded back yard so I knew I wanted to lighten it up by painting the cabinets and off white color. I had to buy beef light kit from Restal Liam since I wanted to brighten everything up. Once you decide on the light or dark kit you must then pick the color choice that you want. I decided to go with the linen color from the Rust Oleum choices. It was a Nice and crisp off white without looking to yellow. Lowes will mix the color for you and put it back in the kit so that you can take everything home and be ready to go. The only items I had to purchase in addition to the kit were paint brushes, paper towels and drop cloths. Here is a pic of the kit:

I forgot to mention that we also bought a sick primer to put on the cabinets that wasn’t included in the kit so that the woodgrain would be covered. It is oil based and sticky, so you need a different brush for this than the one you use for the cabinet paint. The biggest piece of advice that I can give about this project is that it is very time-consuming. Make sure that you have at least five days of on interrupted time to complete this project. I don’t have children or dogs so it was easy for me to lay everything out inside my home on my kitchen and breakfast room floor. Below I will list the steps that I took to paint the cabinets:
1. My husband and I removed all of the top cabinet and placed them in order on a large drop cloth on the floor. We made sure to put boxes and box lid underneath each cabinet to keep them elevated from the drop cloth. This is important because if the paint rubs against the drop cloth you can get bad clumpy texture on your cabinets. Since our hardware was also a really ugly brass we decided to unscrew that and spray paint it with a satin nickel metallic spray paint for a modern finish finish. Once the drawers and cabinets were off I filled a bucket with soapy water and cleaned them all with a sponge. I also cleaned the wood on the frame that was hanging on the wall since that will be painted as well. After cleaning and drying all of the cabinets you can then get them ready for step two.
2. De glosser. The kids give you green scrub pads to scrub down the cabinet with the deglosser. I would recommend buying plastic gloves for your hands so that you don’t get that because author on them during this step. I then poured some of the Deglosser on a green scrub pad and scrubbed down the front and back of both cabinet and the cabinet frame. Once done with scrubbing you have to wipe off the gloss with paper towels. You then have to wait for 1 to 2 hours for this to dry.
3. After waiting 1 to 2 hours you can then apply the primer to the front and back of the cabinet and the cabinet frame. I suggest painting the back side of your cabinets first and letting them dry completely for 1 to 2 hours and then flip over the cabinet and paint the front side side. The reason I do the back first is because sometimes the paint drips and shows from the other side and if you are going to have drips I would rather have them on the back where they will not show once they are hung them on the front where they will be visible.

4. Once the primer is completely dry you can then add the paint which is also called the bond coat. Another great thing about the rest oleum kit is that they number all of the bottles so that you know what order to paint them on the cabinets! Going from dark to light I wanted to make sure that I covered up all of the dark wood grain on my old cabinets so I painted two coats of the bond color to my cabinets. This is the most time-consuming step because you have to paint the back of all of your cabinets first then wait two hours for it to dry then flip it over and paint the front wait two more hours then do the whole thing all over again. Needless to say this took a couple of days for me to complete!

5. Once you are finished with the bond coat and your cabinets are the color you want them to be you can do one of two things. Either you are finished and you can go straight to the protective top coat or you can glaze them for a more antique luck look. I wanted my cabinets to look antique to go with my French country thing so I decided to glaze just certain parts of the cabinet to accent the decorative cuts in the wood. If you glaze over the entire cabinet it will not look white anymore it will look more like a light brown. After going through all the trouble to get a white in later look I didn’t want to darken them all again! I suggest using a tiny brush or a foam brush to apply the glaze in the areas you want on the cabinet. I used a small round painters brush and painted the glaze on in lines outlining the cuts in my cabinet then wipe the glaze off with the cloths that they give you in the kit. It looks something like this:


6. I waited two hours to make sure that the glaze he was dry then I was ready for the protective top coat to be applied. I painted the backside of all the cabinets first and let them dry then flipped the cabinets over and paint the front side. This completed the process for the top cabinets. After that was finished I had to do everything all over again for the bottom cabinets! You can do all of your cabinets at once if you have the space to lay them all out but I wouldn’t suggest it because it is hard to keep track of which cabinet goes where. I also felt like having only eight cabinets to paint at a time was much less intimidating than having 24 cabinets to paint all at once! here are some pictures of the cabinets once they are finished:


Next step in redoing my kitchen is the backsplash! Which do you like??

I would highly recommend the rest oleum cabinet transformations product. There is a DVD that you can watch before starting that shows in detail how to do every step of this project. As long as you wait the recommended amount of time in between each step your cabinets will look professionally painted and will have the added bonus of being done by you! You can read more about Rust Oleum cabinet transformations here:
http://www.rustoleum.com/product-catalog/consumer-brands/transformations/